General
In the General menu you can define general settings for the ThinPrint Client.
- In Listen TCP Port Number you can define a specific TCP/IP port the ThinPrint client is listening on an receiving print job data. The default port number is 4000.
- In Bandwith Control in kbit/s you can specify a max. bandwidth available for printing with ThinPrint. If the value is larger or if Client Control is disabled at the server, server settings are applied (see Configure tab).
- The Log Level menu provides different log levels for information or troubleshooting. The logs get written to /var/log/syslog.
Log Level Explanation Debug Full verbose logging Information Only working processes get logged Notice Simple verbose logging Warning Processes that might fail but don't have crucial impact get logged Error Only failing processes get logged

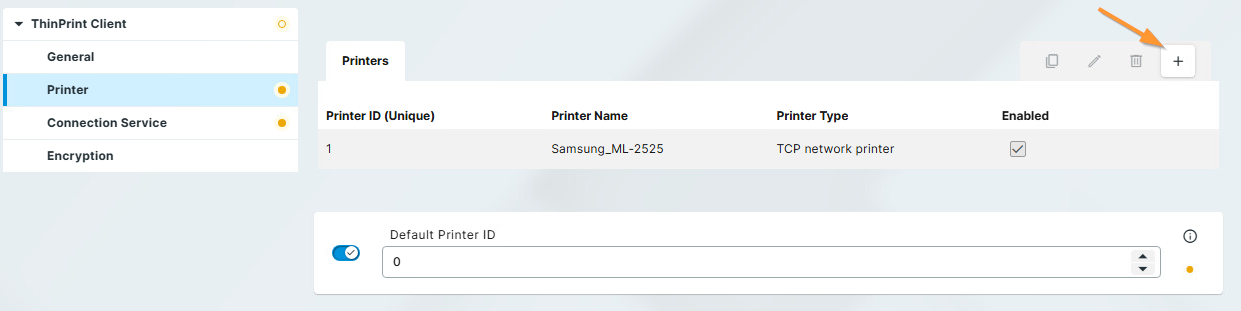
Printer
In the Printer menu you can add new printers or edit existing ones. To add a printer click on the + button which will open the ThinPrint Manual Printer menu.
In the ThinPrint Manual Printer menu you can define necessary settings for any installed TCP/IP or USB printers for printing with ThinPrint.
- Check the Enabled checkbox so the printer gets redirected into the user session
- Set a unique Printer ID in the Printer ID field to make sure that print jobs get assigned to the correct target printer. This is necessary for manually assigned printer names on the ThinPrint Engine (without AutoConnect or Management Services; for more information, see Naming convention).
- Enter a unique printer name in the Printer Name field.
- In the Printer Type field set the corresponding printer type (TCP network printer or USB printer).
- Depending on prio selected printer type enter a printer's IP address or hostname in the Printer Address or Hostname field if you are utilizing TCP network printer or the path to the printer in the Printer USB LP Device Path field if you selected USB printer.
- For server-side automatic printer mapping with ThinPrint AutoConnect, you can enter a class name in the Printer Class field. However, this may consist of a maximum of 7 characters (even if the field allows more than 7 characters to be entered).

Connection Service
If you want to use the Connection Service, enable it in the Connection Service menu.
- To configure the ThinPrint Client to utilize the Connection Service enable the Connection Service Mode field and set Both listen and connect.
- In the Connection Service Server field enter the IP address or the domain name of the machine where the Connection Service is installed on.
- Enter the port number through which the ThinPrint Client is communicating with the Connection Service in the Connection Service Server Port field (default: 4001). See Sample configuration - Connection Service on how to configure the Connection Service on the server side.
- In the Client ID field enter a unique ID the ThinPrint Client authenticates at the Connection Service.
- Enter an authentication key the ThinPrint Client is authenticating with at the Connection Service in the Authentication Key field.
- If the connection between the ThinPrint Client and the Connection Service is interrupted the client will try to reconnect after 300 seconds by default. You can customize the interval the client attempts to reconnect in the Retry Interval field.

Encryption
If you want a secure connection between ThinPrint Engine and ThinPrint Client, you can encrypt print data.
This print data encryption is based on client authentication. When using encryption, two certificates are installed on the server where ThinPrint Engine is running, and a certificate signed by the server is installed on the client. See Creating certificates for printing for more information.
- To utilize encrypted printing enable the Enable SSL Encryption checkbox.
- Enter the path to the imported to the imported root certificate in the SSL Root Certificate File Path field.
- In the SSL Client Certificate File Path field enter the path to the imported client certificate.
- Enter the password for the private key of the certificate file in the SSL Client Certificate Password field.

| Note! On Linux based machines the certificate files need to be imported as PEM format. |